Page Contents
Administrator can customize, chat bar which should appears in Settings → Appearance Tab.
You should save and preview each forms on right side panel.
Customize Chat Widget
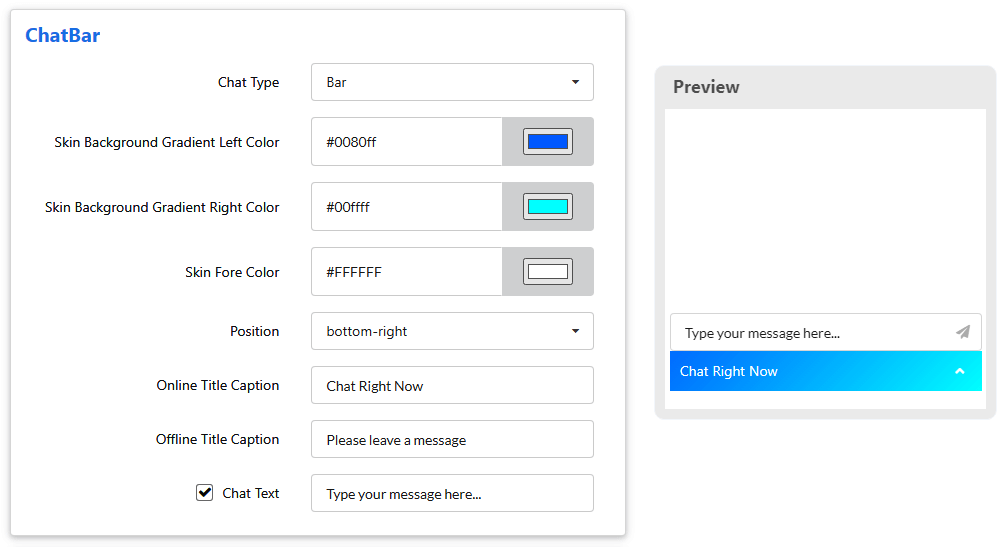
In Appearance → Chat Bar, you can customize your chat widget. Chat type helps you to choose how your widget should be displayed in your website, as chat bar or as chat bubble.
Chat Bar
Widget Position and Color
Here you can pick chat widget color and color of fonts that suits your websites using ‘Skin Background Color’ and ‘Skin Fore Color’.
Decide the position of the widget, where it has to be displayed on your website.
| S.NO | Field Name | Description |
|---|---|---|
| 1 | Chat Type | Choose how should chat bar appear on your screen, either as Bar or Bubble. |
| 2 | Skin Background Color |
|
| 3 | Skin Fore Color | Font Color on your widget. |
| 4 | Position | Where to place your widget. Choose either Bottom Right or Bottom Left. |
| 5 | Online Title Caption | Text to be appeared when your operators are available. |
| 6 | Offline Title Caption | Text appears when operators are away(Offline). |
| 7 | Chat Text | Watermark text in typing area. |
Widget Title Caption
Online Title Caption and Offline Title Caption can be set under Chat Bar option. This title captions will be shown in the chat button either maximized or minimized.
‘Chat Text‘ helps you to pique your visitors’ interest towards you. You may provide it if you’d wish.
Customizing Chat Form
Chat Forms helps you to get information about the visitor when they chat with you. You can set Pre chat form, Post chat form as well as Offline chat form.
Pre-chat Form
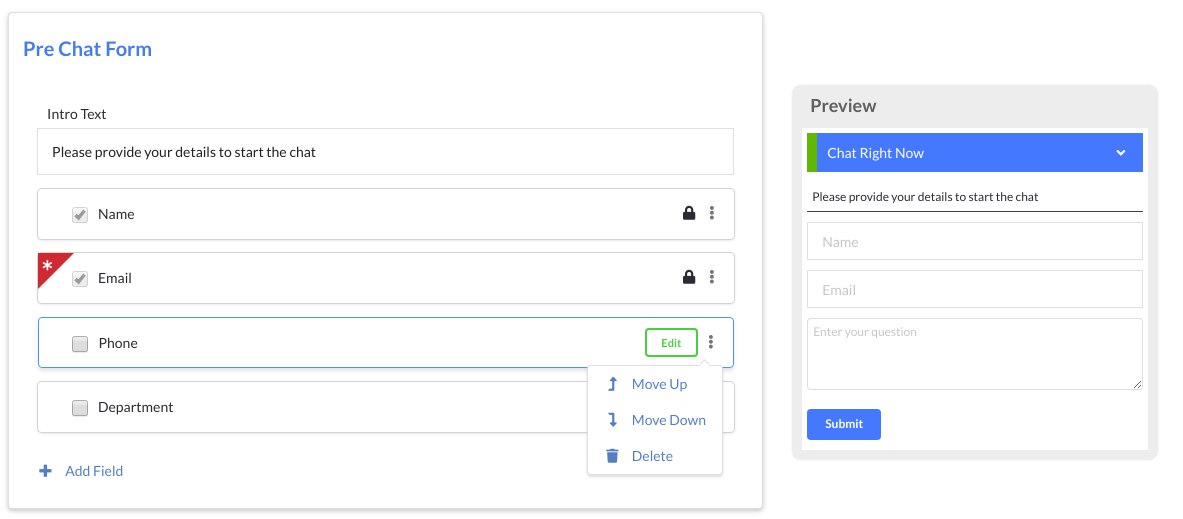
Pre-chat form appears when the visitor, click the Chat button to chat. It helps you to get / collect required information from your visitors. You can enable the Pre chat form, if you wish. By default, Name and Email will be displayed along with the text area, you can add the fields which require from your visitor.

- You can also edit the Intro Message(Pre chat message), if you’d wish, or can leave it as blank.
- To add fields to your pre-chat form,
- Click “Add a field” and provide a name.
- Select the field type, in which type you want to get visitor’s information (either text box / Option / Checkbox / Dropdown).
- Click Add to add the field or delete to add the fields.
- You can edit each fields except the default teams.
- Required fields can be set, by checking “required” in the settings icon associated with each field.
Post-Chat Form
Post chat form helps you to show your gratefulness to your visitor or to introduce a new chat scheme as advertisement. You can also set “Ratings”, to survey your operator’s chat, if required.

Offline Form
The offline form helps you to gather your visitors’ information and query, if your agents are not available to take the chat. When your operators come back to online, they can view the queries by visitors and can respond to them through email.

Route Offline Messages
You can also route those offline messages, to your operators’ email inbox.
To route offline messages to operators’ inbox, check “Email Recipients” checkbox and provide the mail address of your operators to whom you want to route those offline messages. The messages from the visitor when you are offline will be sent to the mail accounts provided here.
If you fail to provide your mail account, all your offline messages will be sent to the Administrator’s account inbox.
Also, you are advised to have a review on your spam folder, if you didn’t have offline messages in your inbox folder.
You can also hide chat button, by checking ‘Hide Chat Bar / Chat Button’ check box.
Customize Chat Greets
Chat Greets helps you to convey greetings automatically when visitor as well as operator, initiate the chat.
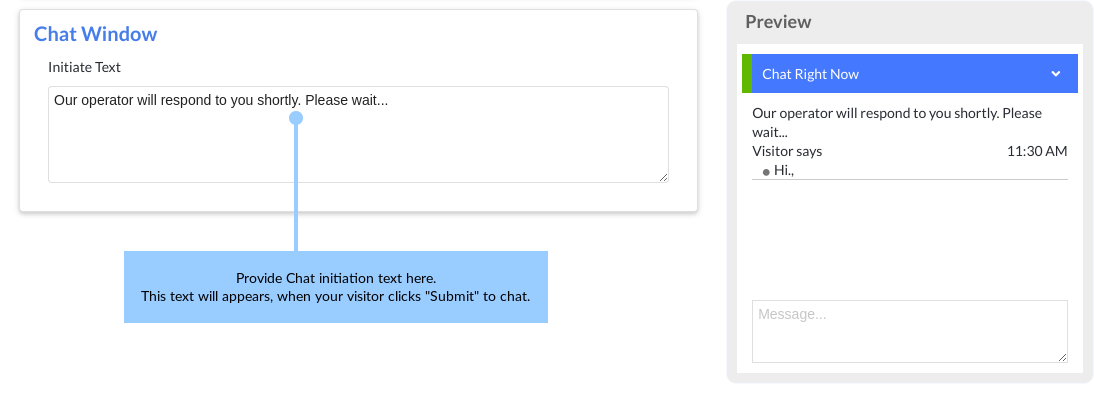
Chat Initiate Text
Chat initiate text is a greeting displayed at the chat window, when visitor click “Submit” button after filling the chat form.

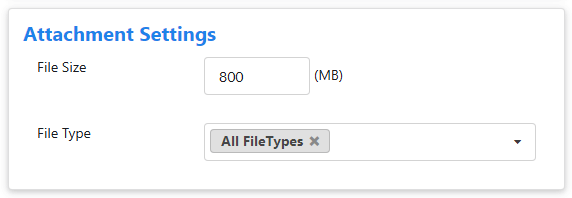
Chat Attachment Settings
You can set the type of files & the file size(in MB) that are allowed to be sent to you from your website live chat window.

