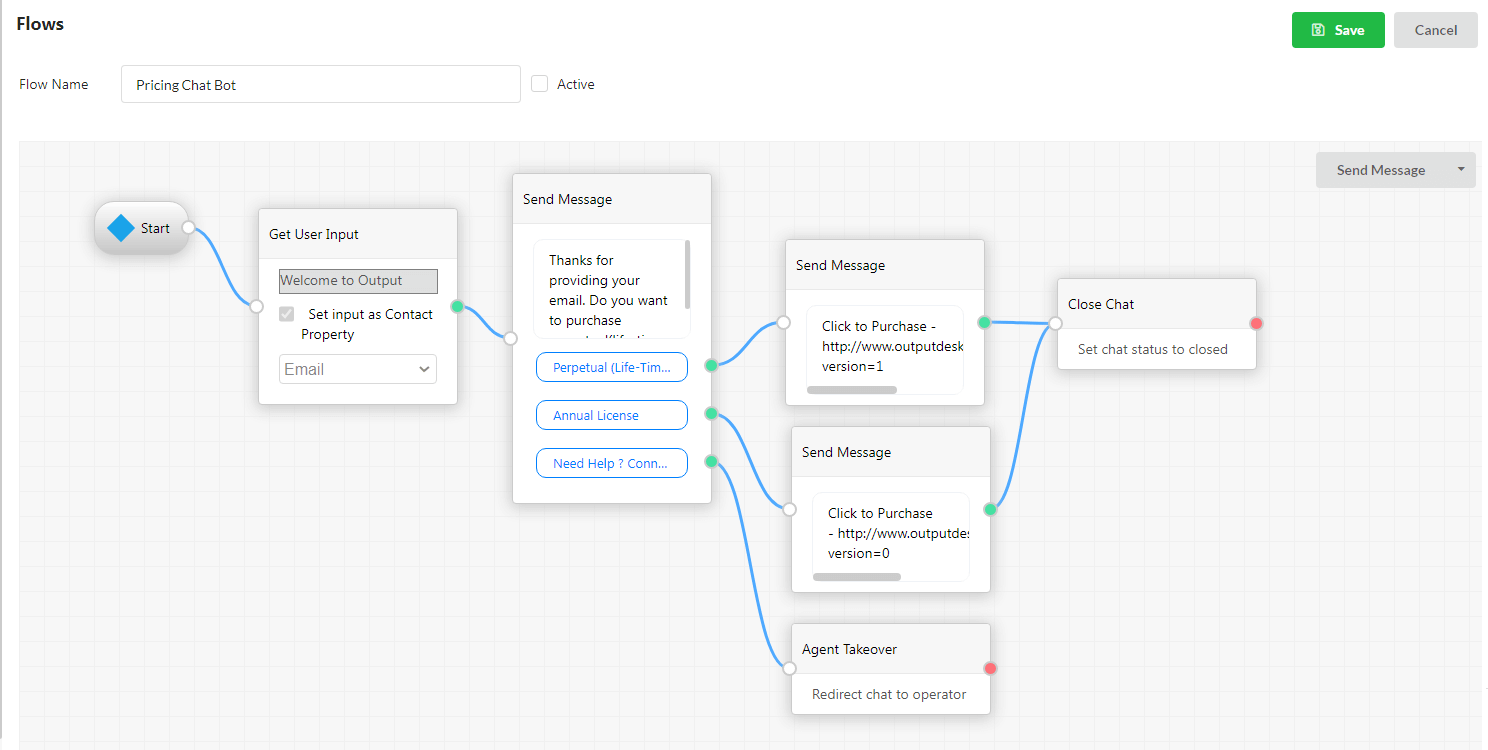
Chat Bots are designed to engage with your customers automatically without any human(support agent) intervention. Chat Bots interacts with customers by getting inputs like customer’s details, contact etc. Based on your customer’s response, chat bots proactively responds to them using some predefined responses.
You can use chat bots as a preliminary interaction before connecting with live chat agent/to handle customer’s repetitive questions/to answers queries faster.
Chat bots will get created as Tickets automatically when the customer responds in bot.Let us see how to build a chat bot in Output Desk.
Chat Bot Builder – Flows
Flows can be used to build your chat bot’s workflow. You can setup each widget(flow box) & connect those widgets using flow lines.Chat bot will work in the flow of the widgets you set up.
Creating Flow
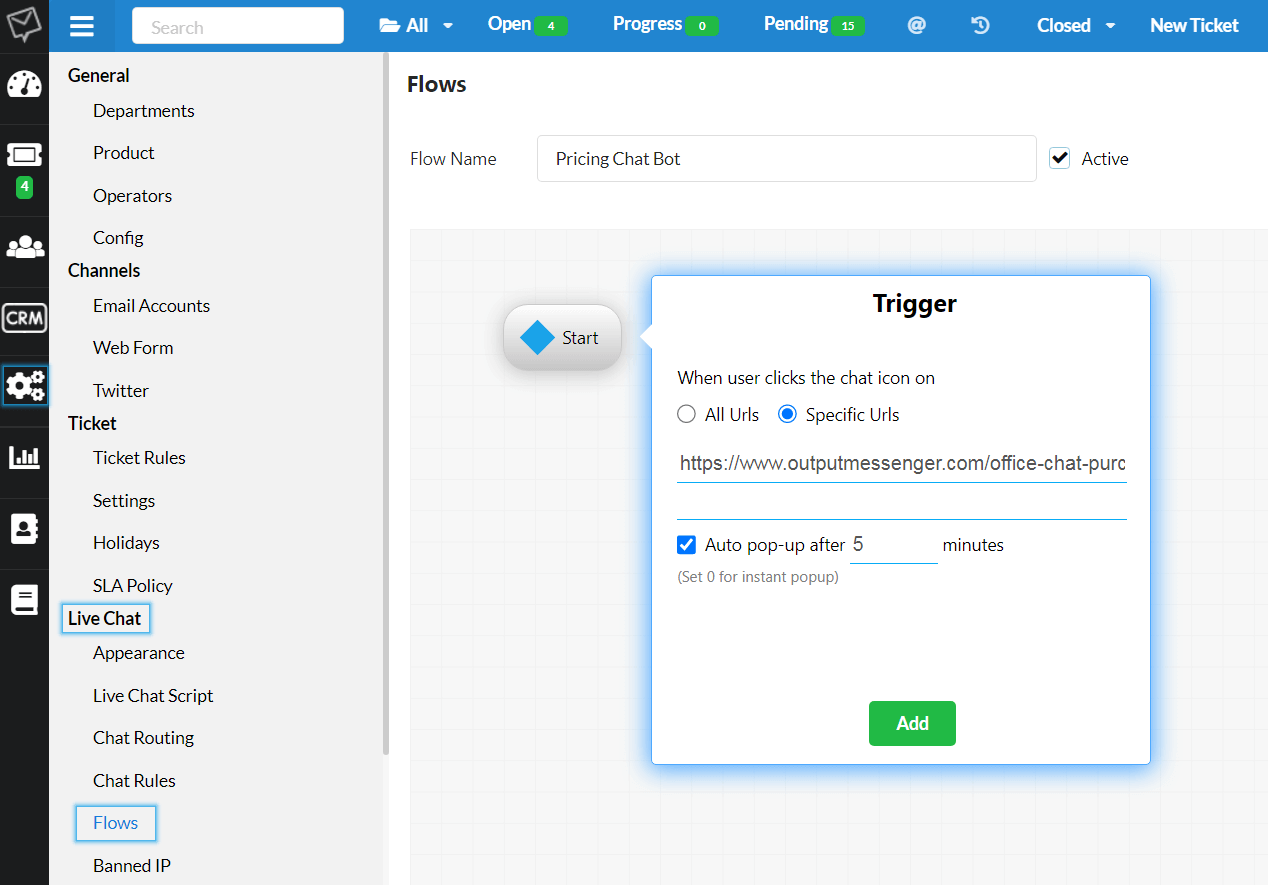
Open Settings & scroll over to the Live Chat option. There you can find the Flows option. Click on it. Start to create a new flow using the “New Flow” button. Enter a name for your flow & enable the Active flag.
Now we can start creating the workflow for the chat bot.
Widgets in Flow
There are a total of 6 widgets you can use in Flow. Widgets can be dragged & dropped anywhere within the flow window.
1.Start
To start the flow, initially you have to setup the Start widget. Start widget will appear by default in the Flow window. From the start widget, you can trigger the action.
Start Actions:
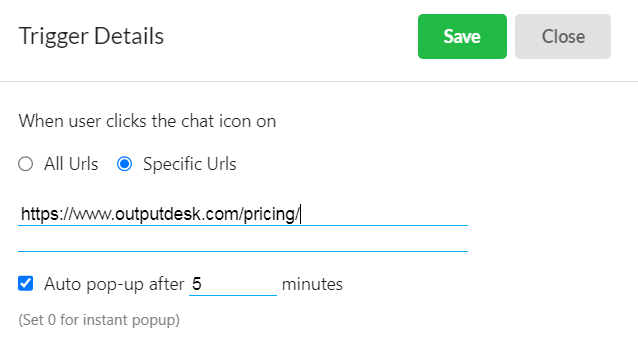
1. “When user clicks the chat icon on” :
All URLs – Enable this to trigger chat bot when a user clicks on the live chat icon in all your websites in which Output Desk live chat script is used.
Specific URL – Enable this to trigger chat bot when a user clicks on the live chat icon in specific page in your website. You can enter any number of specific URLs here.
2. “Auto pop-up after“:
Enable this & set the number of minutes after which you want to chat bot to auto-open as a pop-up. Set the minutes as “0” if you want the chat bot to pop-up instantly after opening the specified URL.
2.Get User Input
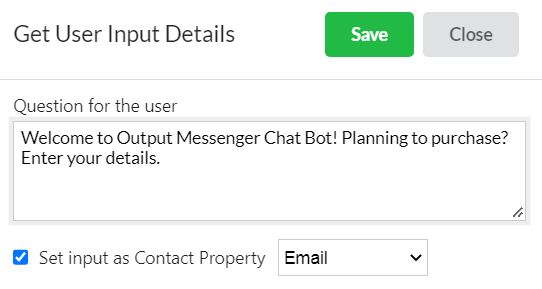
You can get user inputs such as Name, Email & Phone, etc & also save it in Output Desk Contacts using the option “Set input as Contact Property“.
3. Send Message
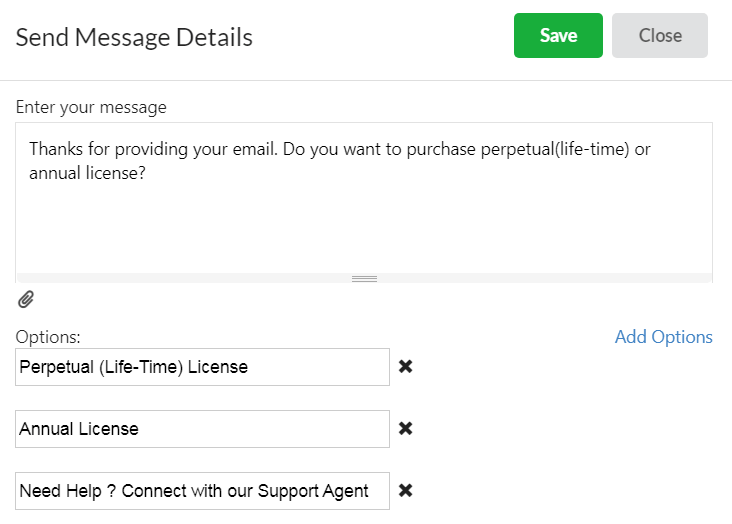
Enter your message or query here. You can also add attachments here(if needed). Add options for the customer to choose. For instance, you can add your various pricing plans. Customer can choose the desired plan.
You can connect each of those options to various widgets.
4. Agent Takeover
Add this to make the customer reach your support/help desk agent for assistance. When clicks on this, he/she will be prompted to live chat window.
5. Go to Flow
Add this to link this current Flow with another flow. Choose the another existing flow & link it here. So when the flow line reaches this widget, it will move on to the linked flow.
6. Close Chat
Add this to end the chat bot.
