Enabling Authentication on MongoDB will secure your database. By doing so, MongoDB will authenticate the user & then provide access to the user to access the database. This is the most important security feature to be implemented.
MongoDB installation is the 1st step in installing the Output Desk On-Premises Server Installation.
So after completing MongoDB installation, we can enable authentication on MongoDB.
How to enable Authentication on MongoDB
Let us see the simple steps on how to enable authentication on MongoDB.
1. Start MongoDB without authentication
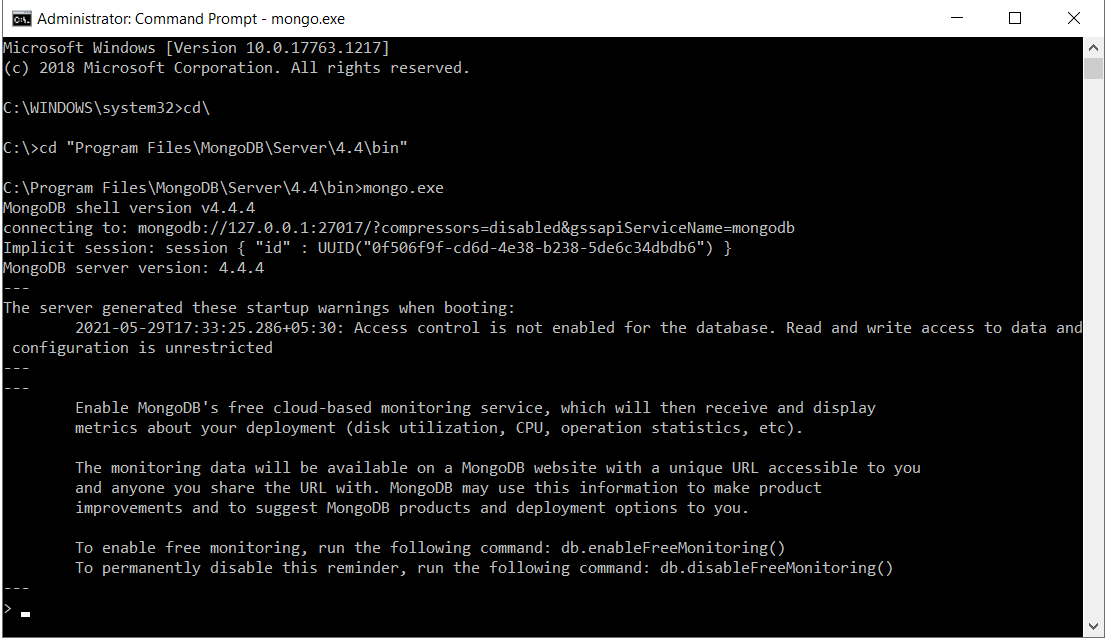
Open your terminal & open the path in which MongoDB is installed. And enter “mongo.exe” to start the MongoDB(as shown in the below screen).
2. Create User Administrator & Password
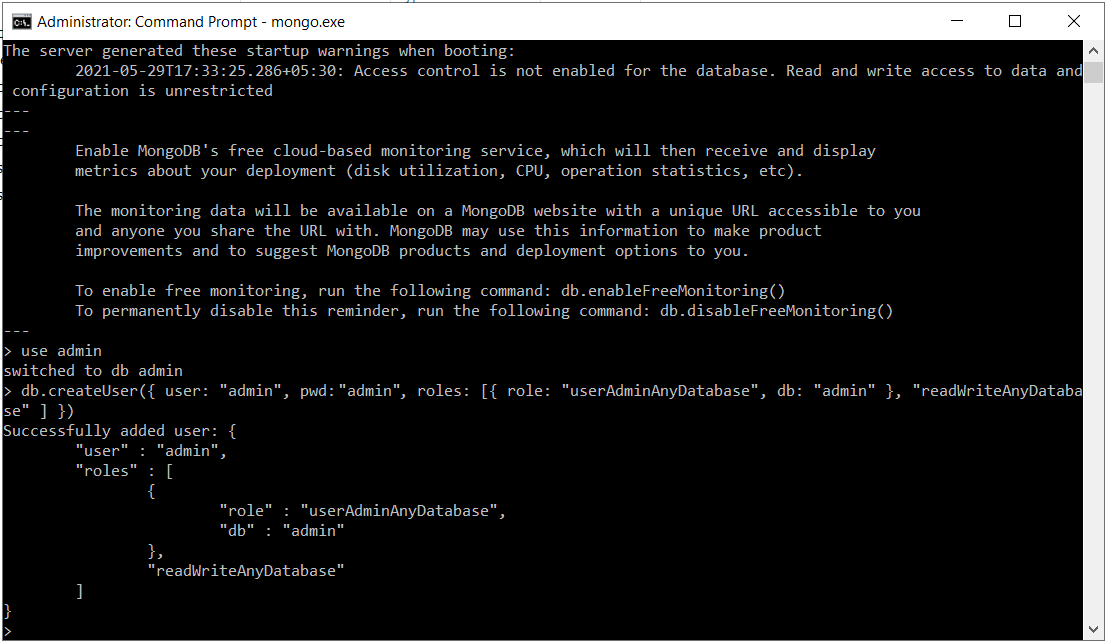
It is needed to create a user with userAdminAnyDatabase role in the admin database, since user admin will have the privilege to create/modify other users on any existing database.
First, switch to admin database using the command “use admin”. After switching, you will have to create admin user. Then, enter below details as shown in the below screenshot will create a user admin with password test.
3. Check Mongodb connection in Terminal
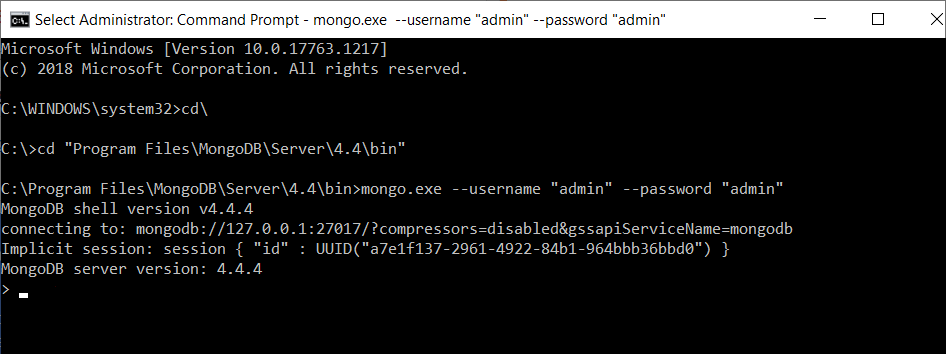
Before moving to the next step, it is mandatory to check whether MongoDB can be connected from Terminal once. This is how you can check:
4. Locate the mongod configuration file
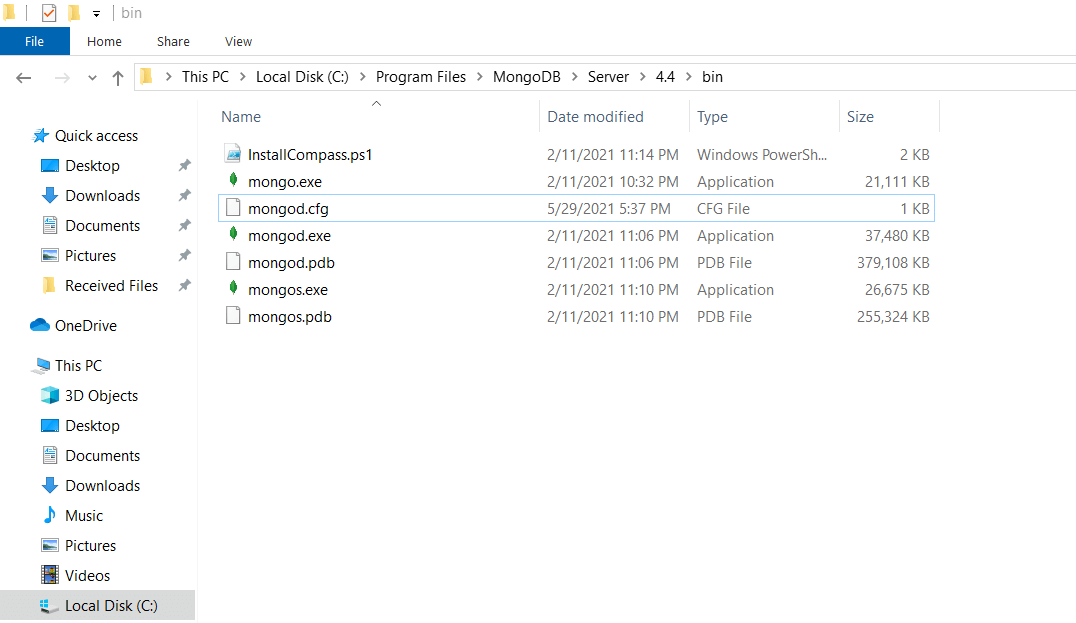
Open the MongoDB installed path and open the below path:
{{MongoDB installed path}}/Mongodb/4.4./server/bin
In the above path, you will find the “mongod.cfg” file.
5. Enable security authentication in mongod configuration file
Open the “mongod.cfg” file & search the below line:
security:
authorization: “disabled”
And change the “disabled” to “enabled”. Save the file after changing.
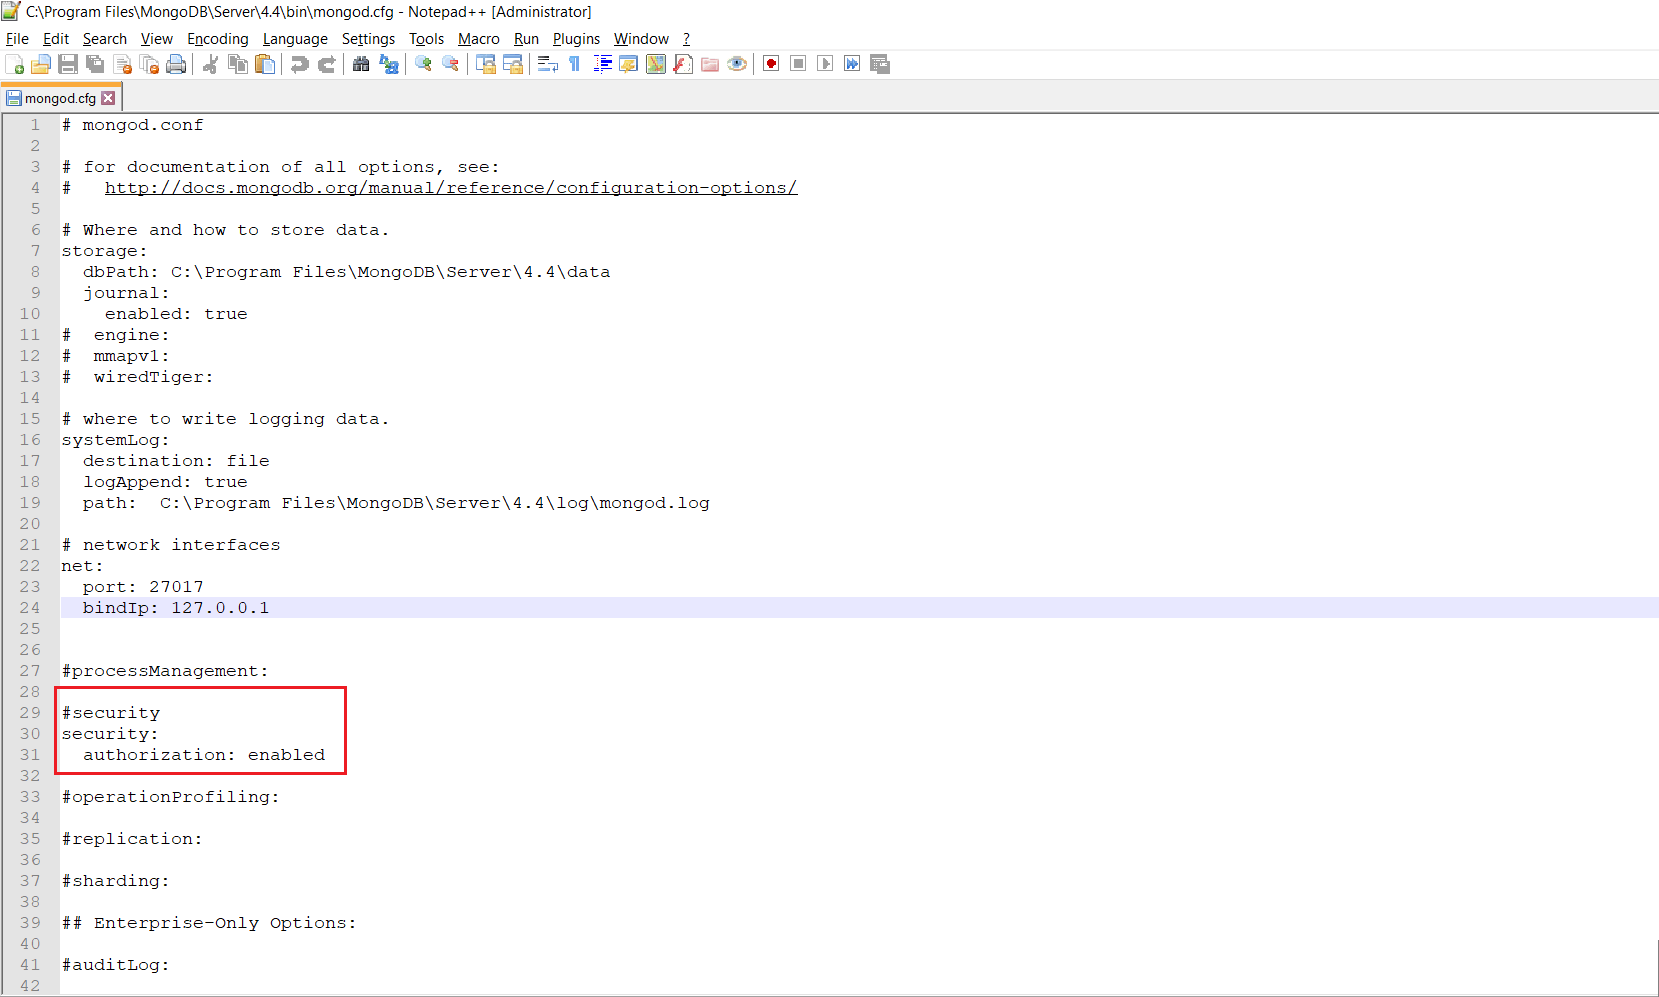 In order to connect remote clients to MongoDB, replace the bindip: 127.0.0.1 with the hostname or its associated IP address
Fore more details: https://docs.mongodb.com/manual/core/security-mongodb-configuration/
Warning: Binding in local host (127.0.0.1) is the most secure option. Only if needed, please do the above change.
6. Restart MongoDB service
Now, restart the MongoDB service so that authentication enabled will get applied for MongoDB access
7. Connect & Authenticate User admin
- Open the folder in which you have installed your Output Desk Package version(OutputDesk-win.exe). Now, you can find a folder named “public” there.
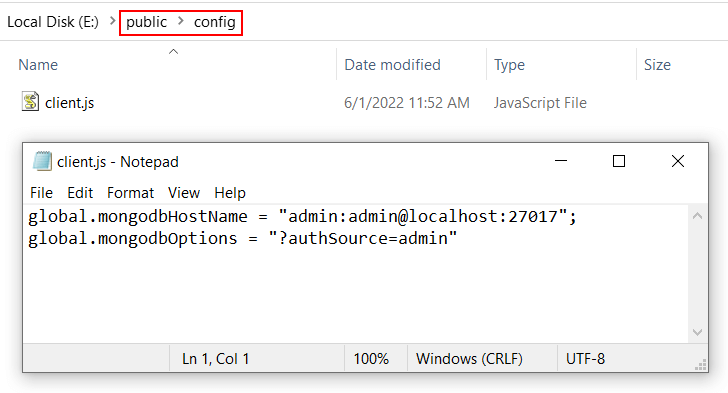
- Open the public folder, & create a new folder named “config”. And create a file as “client.js”.
- Open the client.js file and follow the below.
global.mongodbHostName = “{{mongodbusername}}:{{mongodbpassword}}@{{mongodbhostname}}:{{mongodbportnumber}}”
ex: admin:admin@localhost:27017
global.mongodbOptions = “?authSource=admin”
default “mongodbOptions” variable is blank. If we enable authentication in mongodb, set this value as “?authSource=admin”
8. Restart Output Desk Server
After completing Node JS installation & Output desk server installation, please open System services & restart Output Desk server service for the authentication to get applied.
