Page Contents
How to configure POP settings in Output Desk?
Incoming emails of your email address can be brought as tickets in Output desk by setting the below configuration.
- Select settings from the left panel and choose Email Accounts
- Click “New Email Account” to start your mailbox configuration.
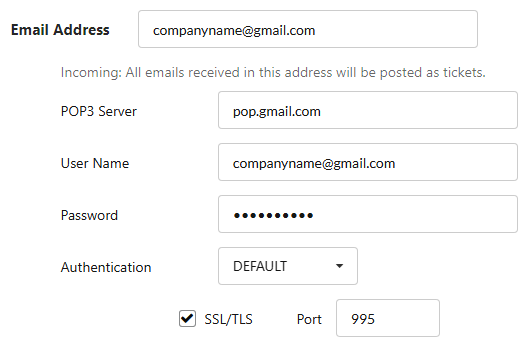
- In the Settings screen, enter your email address in the respective field.
Note: Only the incoming emails of this email address will be posted as tickets in Output desk.
Enter the following settings:
- POP3 Server: Enter the POP3 address.
- Username: Enter your email address/username.
- Password: Enter your email password.
- SSL: If you prefer SSL for mailbox setup, you can enable SSL and provide the respective port in the box provided there.
Else, you can provide the Port number without SSL.
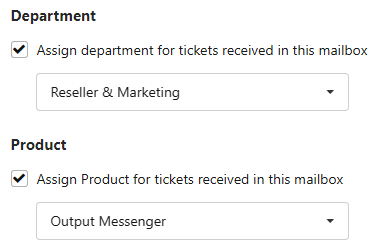
You can assign all the tickets received in this mailbox under a specific department & product.
Assign Department for tickets received in this mailbox
All the tickets will be assigned to the chosen department. Operators belonging to that department can view those tickets & handle them.
Assign Product for tickets received in this mailbox
All the tickets will be assigned under the chosen product. If you have another email ID for another product of yours, you can create another new Email account & select that product for that new Email account.
Set Up Outgoing Email configuration
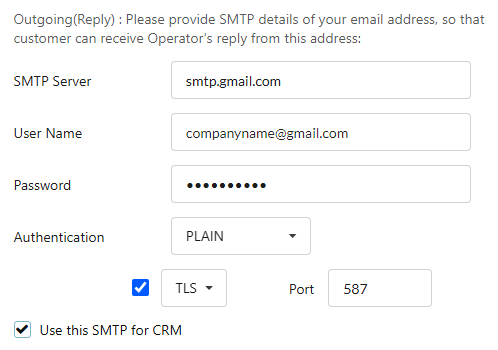
Enter the SMTP details of your email address and provide the following:
- SMTP Server: Enter the POP3 address.
- Username: Enter your email address/username.
- Password: Enter your email password.
- SSL: If you prefer SSL for mailbox setup, you can enable SSL and provide the respective port in the box provided there.
Else, you can provide the Port number without SSL.
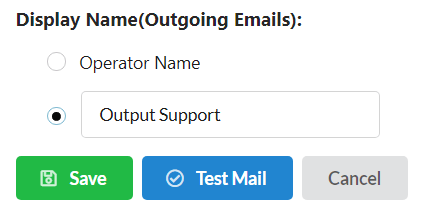
Set a Display Name for your Outgoing Email
Choose the sender name that is to be displayed for the receiver. You can either choose operator name or set up a custom name
Testing / Trouble shoot
It is important to check whether your mail server & POP3 server is getting connected. Follow the below instructions to know how to check this :
For Ubuntu:
- Check whether “openssl” exists in your system.
- Open the terminal window, type the command “openssl version” and press Enter.
- If “openssl” already exists, it will return the version number. Otherwise, it will return like “Could not find openssl”.
- To install openssl, you can follow the steps given in the below link: https://geeksww.com/tutorials/libraries/openssl/installation/installing_openssl_on_ubuntu_linux.php.
- Type and Enter the command
openssl s_client -connect {{POP3 ServerName/SMTP ServerName}}:{{POP3 Server Port/SMTP Server Port}}
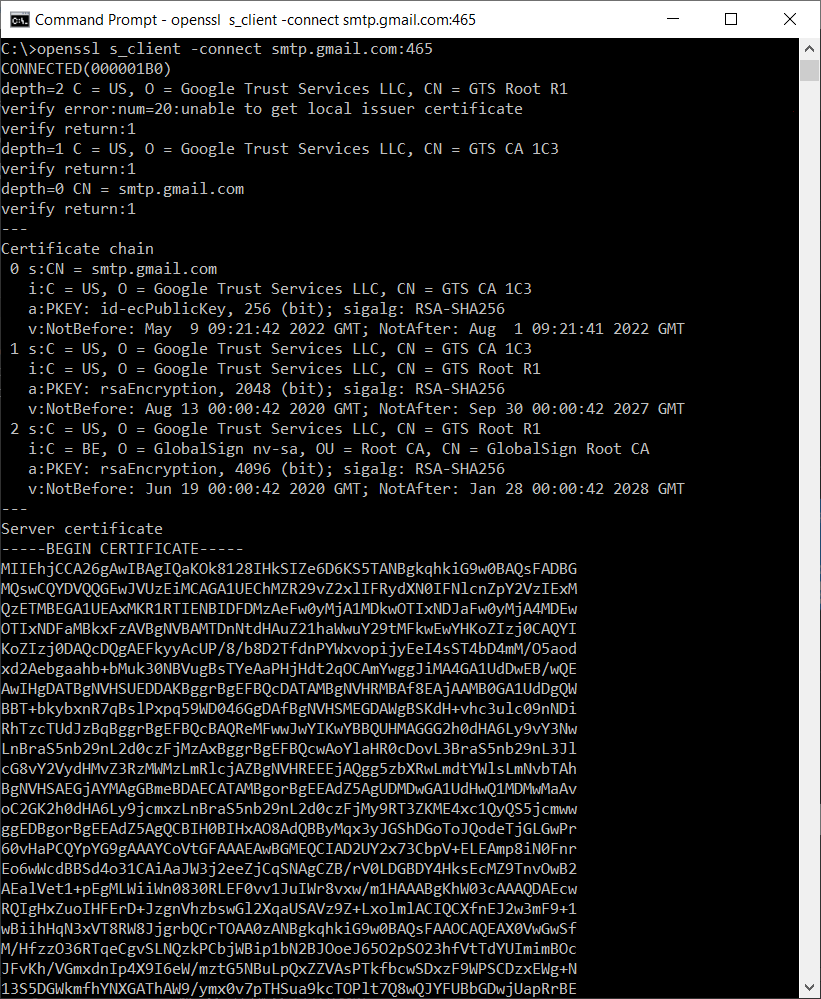
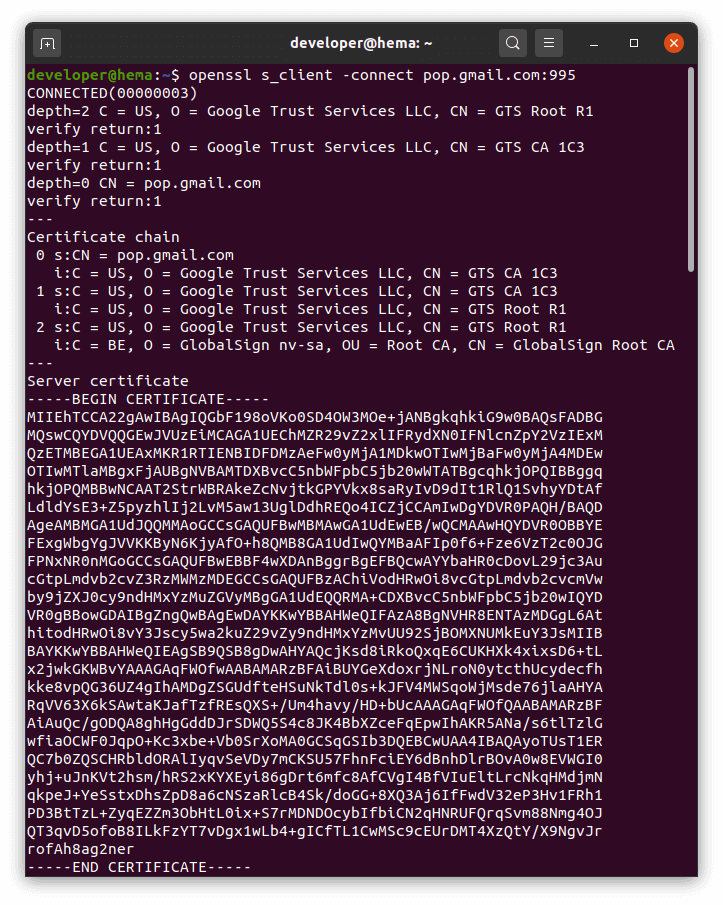
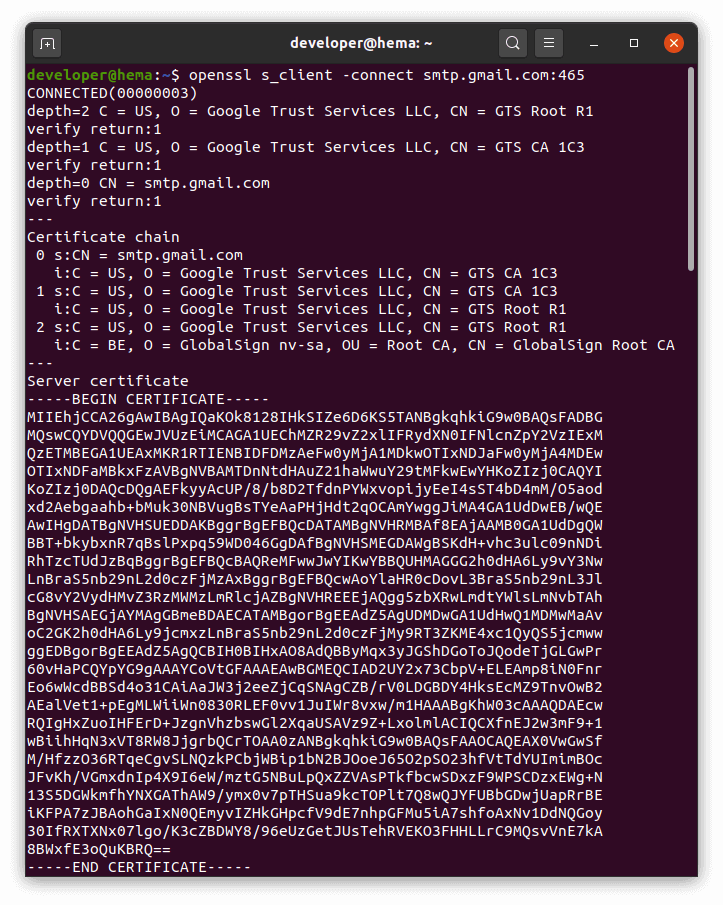
and result shown like below:
For POP3 Server
openssl s_client -connect pop.gmail.com:995

For SMTP Server
openssl s_client -connect smtp.gmail.com:465

- It will provide the certificate details.
- If no certificate detail is shown, please contact support@srimax.com

For Windows:
- Check whether “openssl” exists in your system.
- Open Command Prompt, then type the command “openssl version” and press Enter
- If “openssl” already exists, it will return the version number. Otherwise it will return like “Could not find openssl”.
- To install openssl, you can follow the steps given in the following link https://tecadmin.net/install-openssl-on-windows/
- Type and Enter the command
openssl s_client -connect {{POP3 ServerName/SMTP ServerName}}:{{POP3 Server Port/SMTP Server Port}}
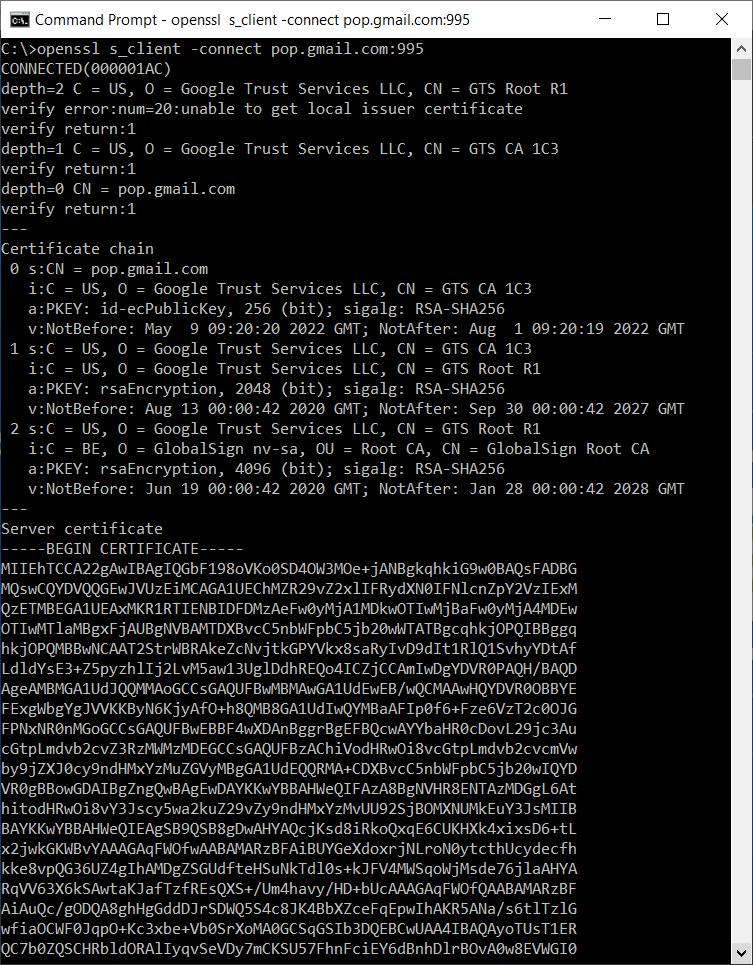
and result shown like below: - It will provide certificate details.
- If no certificate detail is shown, please contact support@srimax.com

For POP3 Server
openssl s_client -connect pop.gmail.com:995
For SMTP Server
openssl s_client -connect smtp.gmail.com:465
