Assigning tickets to a department or support agents help in sending a right and prompt reply to customers.
Page Contents
Assign a ticket to a department
After creating departments and operators in Output Desk,
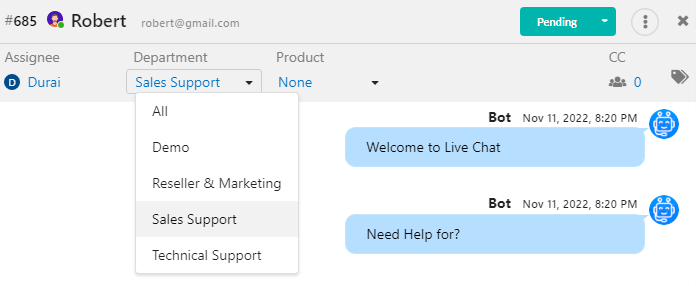
- Open a Ticket, you can find the Department option under the name(customer name) of the ticket.
- Click the drop-down and choose the Department for which the ticket is to be assigned.

Assign a ticket to an operator
After creating operators in Output Desk,
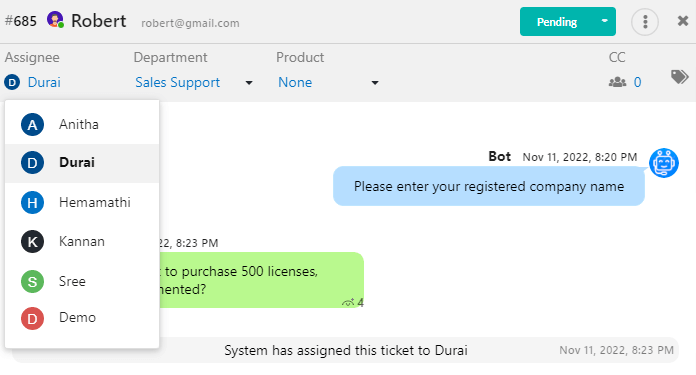
- Open a Ticket, you can find the Assignee option present under the name(customer name) of the ticket.
- Click the drop-down and select the Operator/Agent from the drop-down for whom the ticket is to be assigned.

Notifying operators of assigned tickets
When an administrator or any other operator assigns a ticket to a particular operator, he gets notified of the ticket assignment if he/she(operator) is in online.
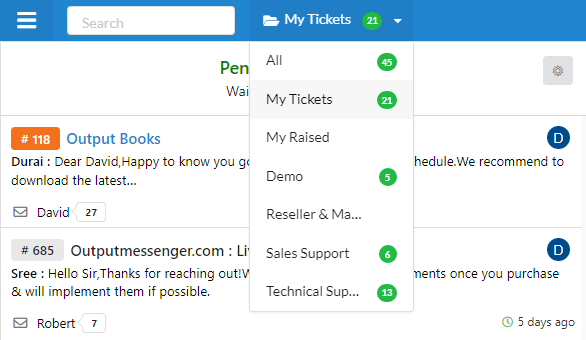
If the operator is offline while a ticket is assigned to him, he can view the tickets assigned to him under “My Tickets” while logging for the next time.
Accessing assigned tickets
After logging in, operators can click the drop-down associated with the Folder icon ![]() at the right of the Search box and choose “My Tickets” to view the tickets assigned to him/her.
at the right of the Search box and choose “My Tickets” to view the tickets assigned to him/her.
Understanding Tags and Their Use in Ticketing Systems
Tags help in organizing the tickets using the keywords that make sense to you. For example, you could add a tag called “Server Migration” to quickly view a list of tickets that involve the steps for server migration.
On opening a ticket, you can find a “Tag” icon at the top right of the ticket. Click that and type the tag desired. Press Enter to save the tag to the ticket.

