Page Contents
The Right Panel
When you open a Ticket in Output Desk, you can find the Contact Information Panel at the right of the ticket. This right panel contains various sections which can be used for including detailed customer information and ticket information.
It helps every operator to have a better understanding of a particular customer and his corresponding ticket.
The various sections of the Customer Information Panel are listed as follows:
About
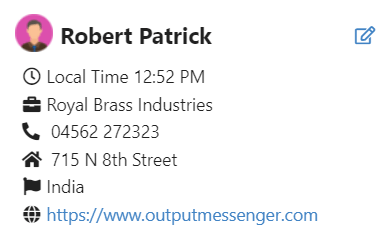
Under the About section, by default you can find the local time at which the ticket is received in Output Desk, Customer Name and Customer Email.
You can click “Edit” button available above the About section and enter the following customer details:
- Company Name of Customer.
- Address of the customer’s Company.
- Phone number of the customer.
- Country in which customer’s Company is located.
- Website of the customer’s company.
After you enter the above customer details, click Save, so that you can find the entered details under the About section.
Visited/Visiting Websites List
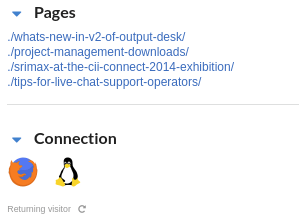
This section is an additional section displayed only for live chat. Displays the list of URLs(your websites/pages) the particular visitor has visited.
Browser details
This section is also an additional section displayed only for live chat. Displays the browsers from which the visitor / customer has visited your website and initiated the chat.
Ticket History
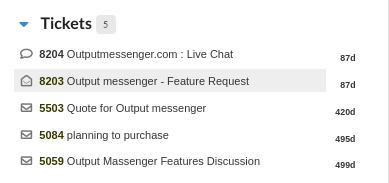
Under the Ticket History section, you can find the list of previous tickets of that particular email ID or particular customer.
You can open any of the old tickets from the Ticket History section and view the entire old email or chat conversation and provide appropriate support to the customer.
Deals
This session belongs to CRM module & it displays the list of deals the customer has made(if you have already created them as deal in crm module). You can also add the customer as deal here by using the “Add” icon present.
Labels
Labels are similar to Tags which can be added to tickets, but it does not group tickets under a particular tag.
You can just use the labels to easily recognize a ticket category or ticket info without reading the entire conversation.
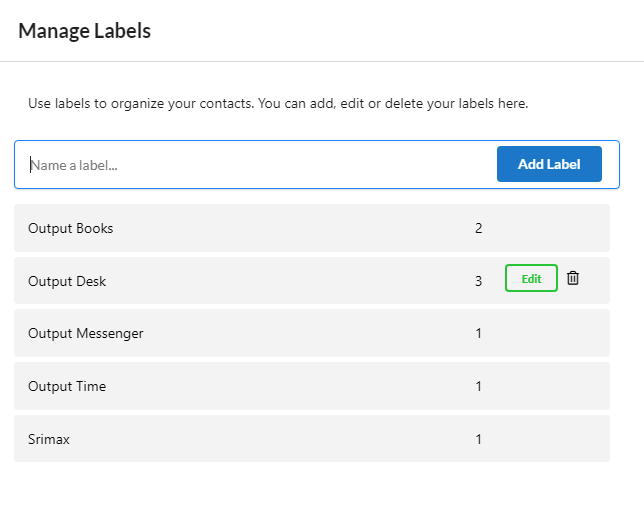
Manage Labels
You can add, edit or delete labels by clicking the “Add(+) icon.
Notes
Notes are used for entering ticket summary or any other useful information about that particular ticket or customer.
Timesheet Duration
Easily add time entries to tickets, simplifying the management of time dedicated to various tasks. By the end of the day, the support durations of each operator will be accurately measured to create a comprehensive report. If you don’t want to record time tracking for tickets, you can disable this feature in Settings > Ticket > Settings > Allow Time Tracking.

To Add a Timesheet Entry
- Click the plus icon located under the Timesheet Duration panel.
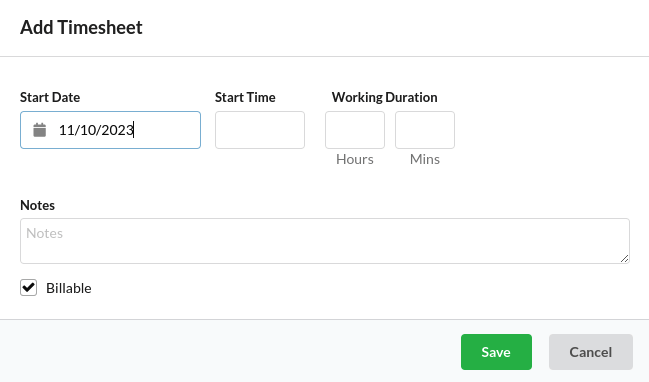
- A popup for adding a timesheet entry will appear.
- Set the start date and time of the task, along with the total duration required for the task.
- Optionally, add any relevant notes. Additionally, specify whether the task is billable or not.
To View a Timesheet Report
Go to Reports > General > Timesheet

